Dearly beloved, we are gathered here today… to look at all my computers. So, without further ado:
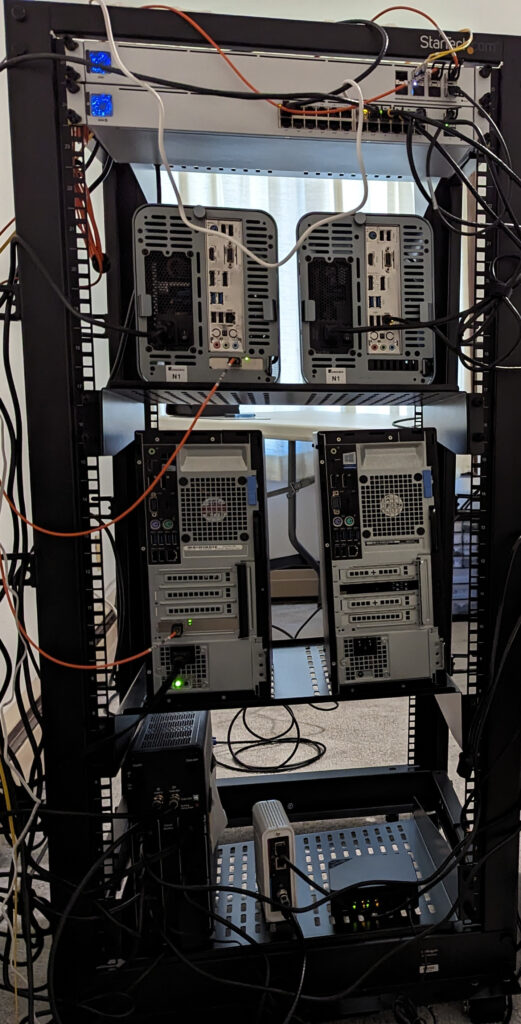
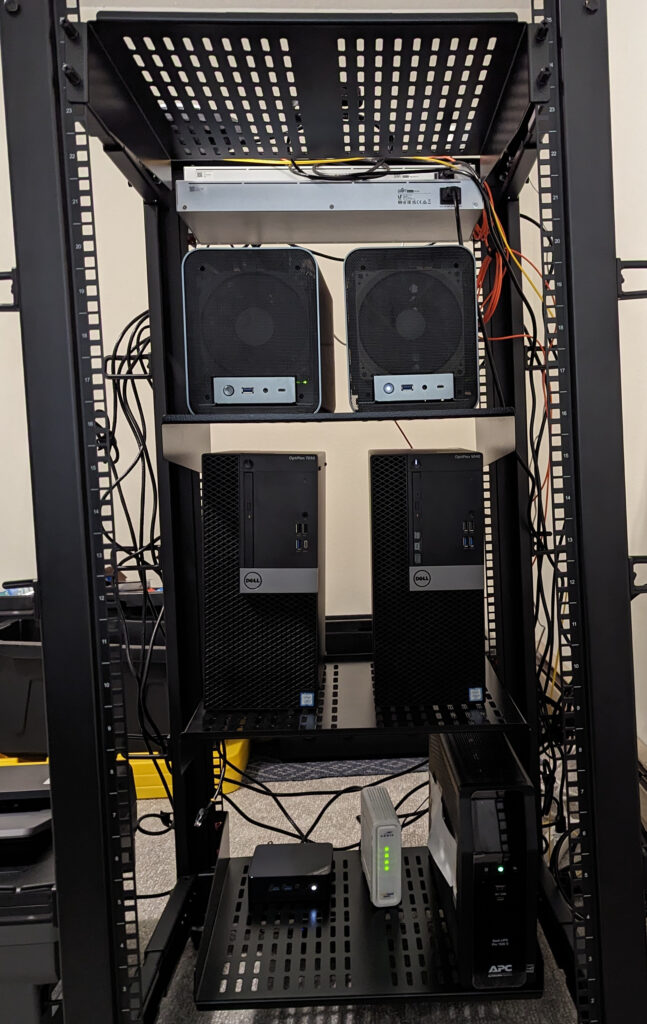
Here is the family picture of everybody on the rack. I think my NAS probably blinked, but I couldn’t be bothered to take a new picture.
Today, I am going to give an overview of everything in my homelab. We will start with hardware, then software, and finally I will wrap it up with a network summary.
Hardware
First, the rack. I used to just have several computers all running on a folding table, but I realized that a) it starts to get hard to reach what you need when the computers are sprawled out across the table and b) I can probably save space in the room by building up vertically rather than horizontally. So I got a rack.
The rack is a StarTech 4-Post 25U Mobile Open Frame. It is a standard 19″ wide rack with an adjustable depth. I opted for 25U because I wanted some room for future expansion, and also because most of my existing gear is not rackmount, so it lives on rack shelves. I also opted for an open rack, in part because it makes it much easier to access things but also because enclosed racks are ludicrously expensive, not to mention heavy. My general philosophy was I wanted a rack but I also wanted to keep things flexible for future changes – changes to both what is in the homelab but also changes to space constraints/living situation. For example, I wanted to be able to undo this operation and go back to not having a rack if that makes more sense in the future.
I have heard people say there is a rack tax. What they mean by that is that anything rack-related – racks themselves, shelves, gear designed to be rack-mounted, even simple cable organizers – they are all much more expensive than you would expect compared to consumer gear. And the main reason for that is that they are lower volume, intended for business customers instead of residential customers.
As an example, here is what I used for rack shelves:
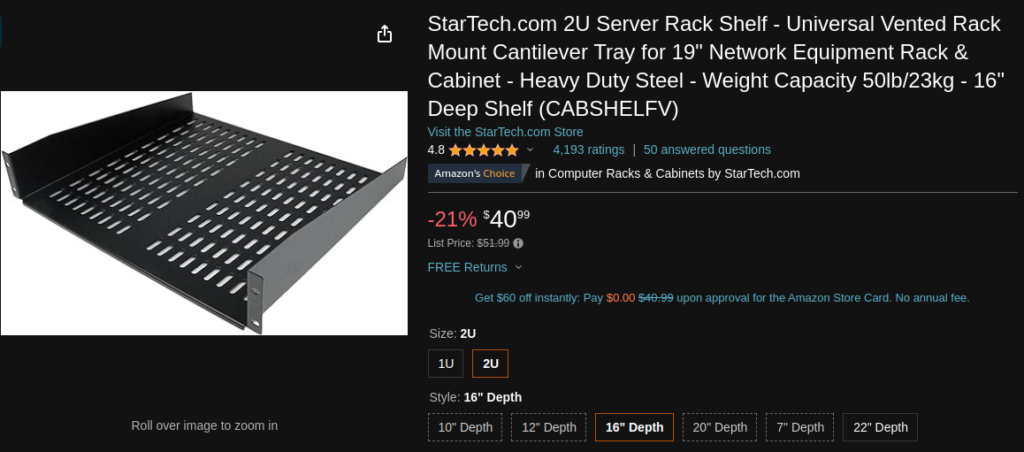
This guy was $37 at the time I purchased shelves. And I had to buy more than one of them. That is some expensive metal. Let’s just say my wallet and my rack are not best friends right now.
Aside from the price, though, I have been happy with both the rack and the shelves. Another useful rack tool is a product called Rack Studs:
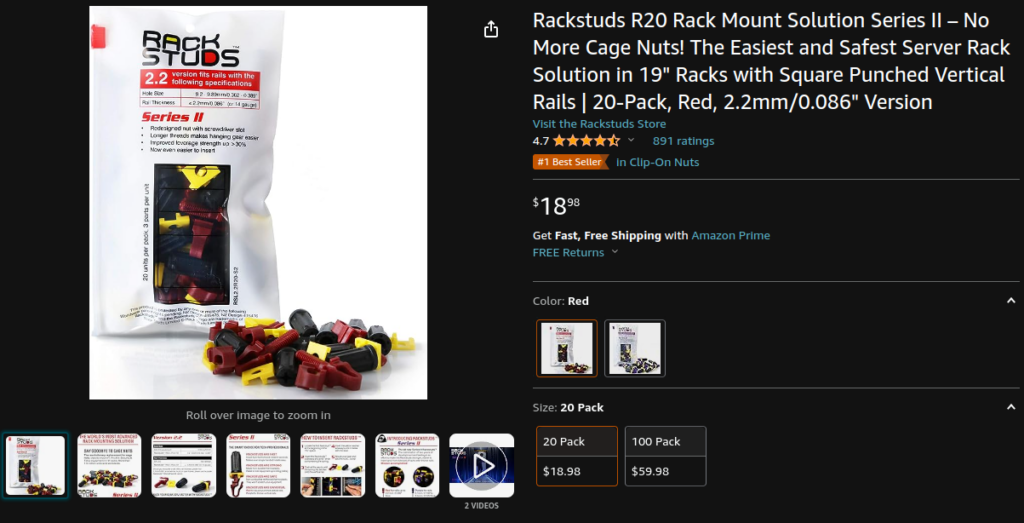
They are basically a plastic alternative to traditional metal cage nuts that are much easier to put in. A joke I have heard is that all new racks require a blood sacrifice, because it is easy to hurt your hands while trying to add or remove cage nuts to a rack. Some combination of sharp metal edges and possibly use of screwdrivers to help squeeze things in makes it a bit hazardous. Rack studs are a nice alternative, at least for lighter-weight things like network switches. They do have lower weight limits than cage nuts, so you might not use them for something heavy like a UPS.
So that’s the rack itself. What about the things on it? Let’s start with the switches:

The top switch here is a Ubiquiti USW-Aggregation. It has 8 ports which are all 10G SFP+. This connects devices that have 10G. Below it is the primary core switch for everything else, which is a Ubiquiti USW-24-PoE. It is a 24-port 1G switch, and also has 2 uplink 1G SFP ports. Of the 24 RJ45 ports, 16 are PoE+, and the rest don’t supply power. I also have this guy:
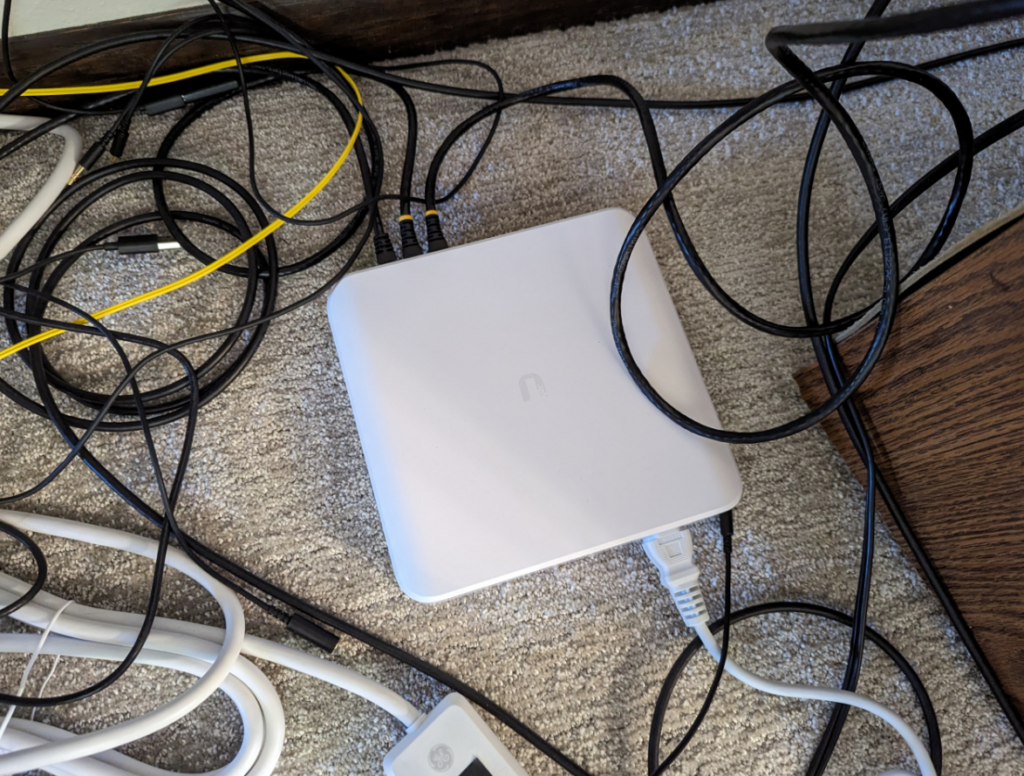
This is a Ubiquiti USW-Lite-16-POE. It is a 16-port 1G switch. 8 of the ports are PoE+ and the other 8 ports don’t supply power. It was naughty – probably drew on the wall or ran with scissors, that sort of thing – so it got banished from the rack and was sentenced to living out its days on the floor instead.
These 3 switches are all I currently have running at the moment. I also have various 8 and 5 port switches, usually either TP-Link or Netgear, some smart, some dumb, that may get used temporarily or may be used at another location as needed.
The basic idea was the 10G switch is the backbone for anything that needs faster speeds and most other things are connected to the core 24-port switch. PoE is handy for powering things like access points or cameras. The 16-port switch is basically like an offshoot core switch if there is higher connection density somewhere else and I can’t be bothered to run individual cables all the way back to the core switch.
There is also one access point which currently sits on top of the rack:
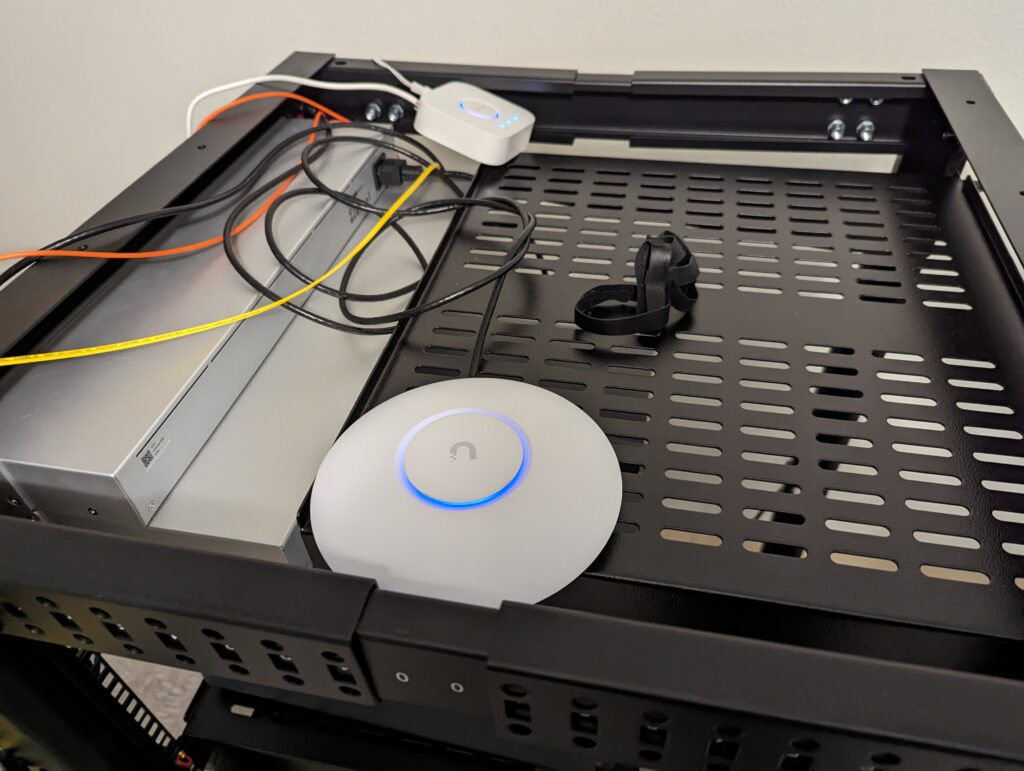
That is a Ubiquiti U6+, their midrange Wifi 6 access point. Putting it on the top of a metal rack probably isn’t optimal for the signal, but it is working perfectly fine for my needs so far, so it will stay there.
That other white box in the top of the picture is the Philips Hue Bridge. The power cable is a bit short, in my opinion, and unfortunately it doesn’t support PoE. So it can just barely reach the top of the rack, but the cables pull it back down. A bit of an eyesore, but it works fine.
That is all the networking gear. Next up, the NAS and backup NAS:
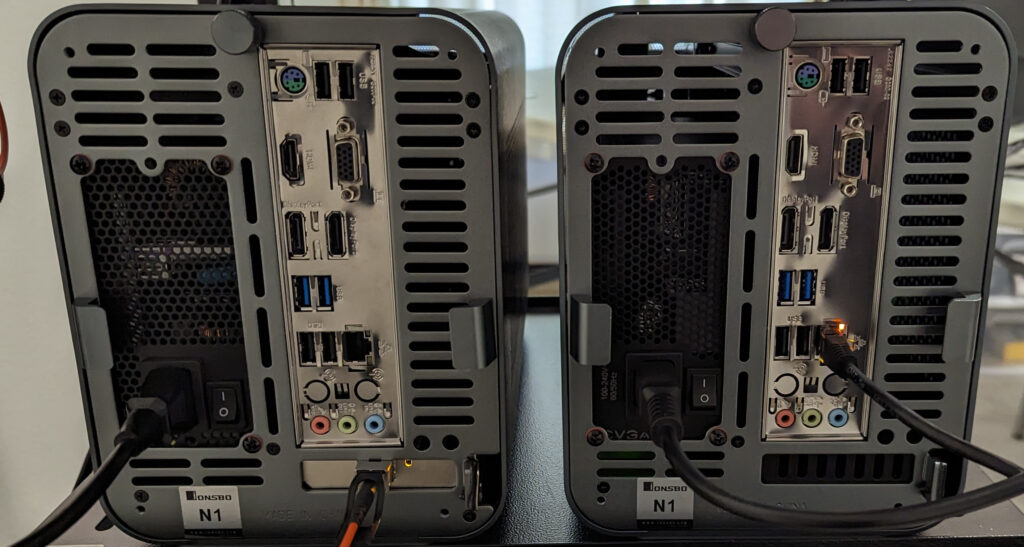
These NAS builds are almost identical. Here are the common components:
Case: Jonsbo N1
PSU: EVGA SuperNova 650 GM (or equivalent SFX power supply)
Motherboard: Gigabyte H610i DDR4 (or equivalent motherboard supporting intel 12th gen and DDR4)
CPU: Intel Core I3-12100
RAM: 32GB DDR4 Corsair Vengeance 3200Mhz (or equivalent DDR4)
The differences between the primary and backup NAS are in RAM, storage, and networking. The primary NAS has 32GB RAM, 2 12TB Seagate Ironwolf HDDs, and a 10G SFP+ Mellanox NIC. The backup NAS has 16GB RAM, 2 8TB Seagate Ironwolf HDDs, and just uses the onboard 1G ethernet. The basic idea is that the backup NAS is only touched if the primary fails, so it doesn’t need to be as fast. The storage in the backup NAS came from the prior NAS build I had done, and in that time HDDs for the same price got bigger so that is why the primary has more storage.
The Jonsbo N1 case can, on paper, fit 5 HDDs. I personally would get a different case if I was doing more than 4 drives – it is small and tight and hard to fit things in with only 2 HDDs, which is what I have. If anything I would probably get a bigger case for anything more than 2 HDDs. But for 2 HDDs, it is a nice, compact NAS build. And the mini-ITX form factor gives one PCIe slot, which I used for the Mellanox NIC. The Jonsbo N1 feels like a good fit if you have this exact use case of a small but powerful NAS with 2 drives. I used the motherboard m.2 slot for the actual boot/operating system drive.
Next up is the hypervisors (virtual machine hosts):
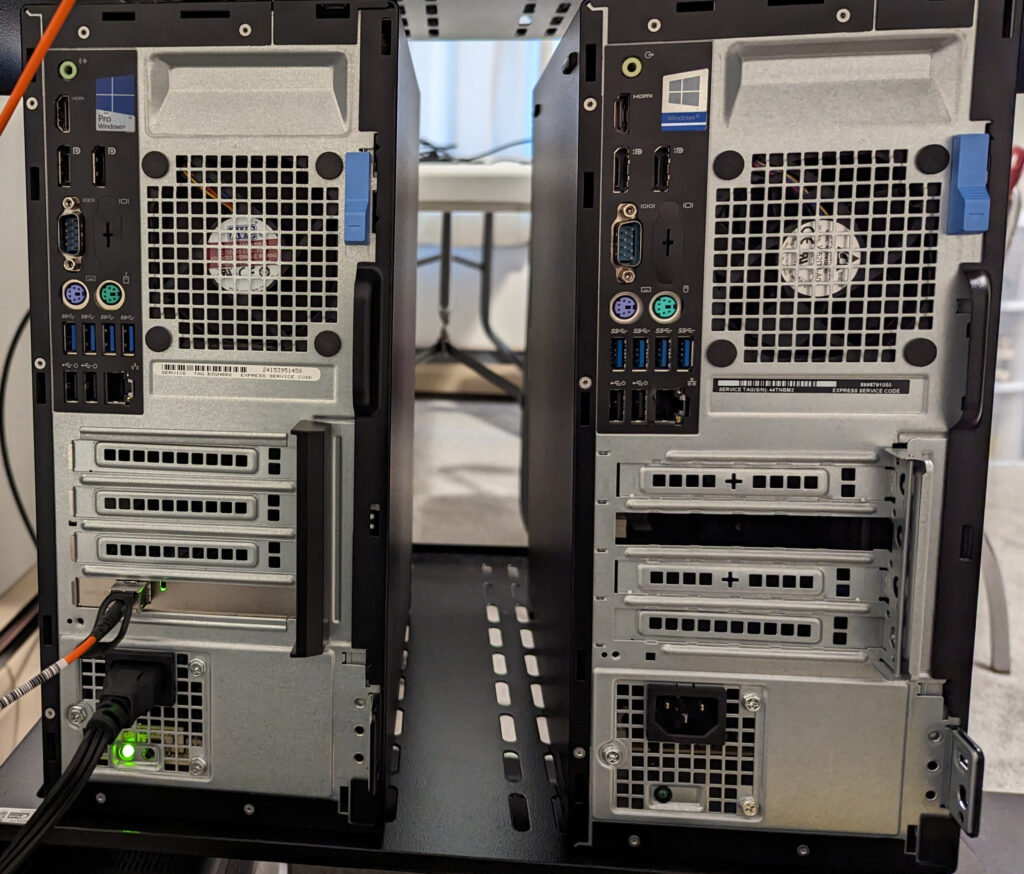
I use these to run virtual machines. The one on the right is a brand-new addition. You may notice, with your keen detective abilities, that it isn’t actually plugged in to power. So it isn’t running. Probably. Hopefully. If it is running I would be concerned.
As for the unit on the left, the currently running hypervisor, here are the specs:
Model: Dell Optiplex 5040
CPU: Intel i5-6500
RAM: 24GB DDR4
The hypervisor operating system and virtual machine data are all stored on the same physical disk, which is a 1TB NVMe drive in the motherboard’s m.2 slot. It also has the same 10G Mellanox NIC as the primary NAS does, a Mellanox ConnectX-3 CX311A.
Last on the rack, we have the “everything else” shelf:
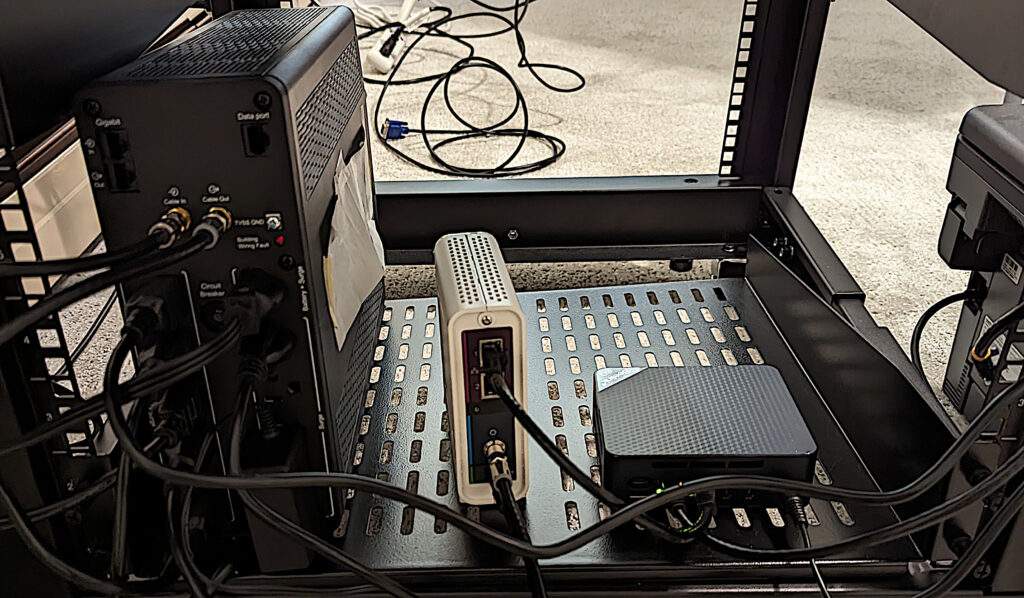
Starting from the left, we have the UPS for battery backup. It is an APC BR1500MS2, rated for 1500VA. It is heavy so it lives on the bottom rack.
Next we have the cable modem. That is a Arris Surfboard SB8200, for all your surfing needs. It is basically just a bog-standard DOCSIS 3.1 modem with no routing or wireless capabilities. The web UI isn’t amazing, but I guess there is nothing you can really change in there so it doesn’t matter.
Finally, on the right side, is the router. It is a Beelink EQ12 Mini PC. It is pretty low-powered, with an Intel N100 CPU. The N100 is basically just 4 of Intel’s efficiency cores with no performance cores at all. But that is still plenty for a router, and it is power-efficient as well. The other useful feature on the Beelink for router purposes is that it has two 2.5G ethernet ports, so you can use one port for LAN and the other for WAN.
That is all the rack/infrastructure hardware. Anything else I have is endpoints like a phone, laptop, desktop, and so on. Next up, the software.
Software
The Ubiquiti switches all run Unifi OS or whatever they call it. They then connect to the Unifi controller, which I have running in a docker container on a virtual machine on the hypervisor. You can manage all the switches and APs from one dashboard. It is nice, for the most part, though sometimes it feels like a nice-looking UI that buries the settings I actually want. It feels like Ubiquiti can’t make up their mind and keep shuffling the UI around. Overall, I am still happy with it.
The two NAS’s run TrueNAS Scale. Right now I just use them for storage and not for any applications/virtual machines.
On the primary NAS, I have two 12TB HDDs configured as a mirrored vdev and also a 500GB SATA SSD acting as the l2arc read cache. It has several SMB file shares, which I access from both Windows and Linux. I also have frequent, automatic zfs snapshots being created. This NAS is basically the source of truth and data integrity. Any important data either lives here or gets backed up to here. For example, my general image/documents library is accessed directly from the NAS (from desktop/laptop, etc). The hypervisor also stores virtual machine backups to the NAS.
The NAS, in turn, is backed up in other places. First, the backup NAS pulls all datasets/snapshots from the primary, so there is another local backup. The backup NAS only has an 8TB volume because it has smaller drives, but the size of my data is less than 8TB so it works fine even though the NAS and backup NAS aren’t identical.
The primary NAS also backs up to the cloud. Historically I used Amazon S3. I recently switched to Backblaze B2 using its S3 compatible API. This backup is encrypted on the NAS and then sent to the cloud provider. I also, every few months, do a manual backup to another local-but-offsite location. I basically do a cross-backup with another NAS, specifically a Synology DS218+ I used to have that now is in service for somebody else.
Overall I am mostly happy with TrueNAS Scale. It isn’t as user-friendly as something like Synology. For example, on Synology you can change NTFS-like permissions/ACLs anywhere in the directory structure. On TrueNAS Scale, you change it at the root or dataset level, and then to do it anywhere deeper, as far as I am aware, you either use commands like facl on Linux or use the NTFS permission editor from a Windows client. That being said, once you get it working it is powerful and exposes useful zfs features like snapshots and snapshot replication.
For the hypervisors, I use Proxmox, which is basically a web UI over Linux KVM virtualization. It works well for my use case. It has the standard functionality you would expect of a hypervisor. You create a virtual machine by allocating CPU, memory, storage and network resources. Then you can start, stop and pause VMs. You can view the graphical console, mount an ISO file and boot it to install the operating system, and you can also configure automatic backups. It basically just works and doesn’t get in the way of what I am actually trying to do. I haven’t used the clustering/VM migration features, though, so I can’t speak for them.
I run several virtual machines on my virtual machine host. Shocking, I know. Here is a brief overview:
- Pihole – Theoretically this does some work blocking ads, tracking, and malicious domains. But I use ublock origin in the browser, so I don’t tend to see those anyway. I mostly use this as a discipline/habit tool, to block websites I don’t want to spend time on.
- Syncthing. I run the syncthing server as a VM, and then run a client on my phone. The basic idea was that it syncs the images on my phone to someplace else. That way if my phone were to meet an untimely demise falling 7 floors onto concrete – purely hypothetically, of course – and was damaged in such a way that the data is unrecoverable, I would be able to access the same images on the syncthing server. I normally “manually” offload images from my phone every 2-4 months, and syncthing fills in the “just in case” gap.
- Docker. This virtual machine runs… wait for it… docker. This is where most of the applications are hosted, at this point. I have:
- Unifi Controller, for configuring the Ubiquiti switches and access points.
- Firefly III. For some reason it is called that and not firefly 3. I don’t know why. Anyway, this is a personal finance tracking app. I have seen it compared with YNAB before, but I haven’t used YNAB so I can’t speak to that. What I use it for is transaction tracking and tagging. Basically, I look at every financial transaction – in bank accounts, credit cards, and so on – and enter it into firefly. I can then tag and categorize it. For example, if I get gas, I tag it car. If I pay for an oil change, I tag it car. I can then use its reporting features to ask “what was the total cost of ownership of my car this year?” and similar questions. I have been very happy with it for the past two years or so.
- Gitlab. Just self-hosted GitLab. Doesn’t get much use, though, haven’t spent as much time doing development recently.
- Trilium. Trilium bills itself as “a hierarchical note taking application with focus on building large personal knowledge bases.” What I use it for is journaling/self-reflection. I probably only use a tiny fraction of the features, but I have been quite happy with it.
- Portainer. A graphical interface for docker, I guess, though I usually forget I have it running. I just use a few basic docker commands and docker-compose so I don’t tend to use it, but I figured it wouldn’t hurt to have it.
There have been other containers or virtual machines I ran in the past, but what I listed above is the non-experimental stuff that is “in production” in my homelab.
That covers the hypervisors and virtual machines. That just leaves the Beelink Mini PC that I use as a router. That is currently running OPNsense, though in the past I ran pfSense. I think they both work well.
Network
The network infrastructure consists of 3 switches, 1 access point, and the router. The WAN interface on the router connects directly to the modem. The LAN interface connects to the core switch. The LAN is split into 3 subnets: Main (I just call it LAN internally), guest wifi, and IoT. Main is what the network infrastructure, servers, and trusted guests (e.g. my laptop/phone/desktop) are on. Guest wifi is for anything else that just needs internet access. IoT is for things that should function without internet access at all.
This network segmentation is done with a corresponding untagged VLAN 1 for the core/Main subnet, and tagged VLANs for guest wifi and IoT. I used to also tag the Main subnet with VLAN 1, but I found some networking gear doesn’t handle it properly so I decided to just run it as untagged instead.
The access point has 3 SSIDs corresponding to these 3 networks, which tags them with the appropriate VLAN.
There are 3 devices that have a 10G connection: the primary NAS, the primary hypervisor, and my desktop. Nothing else would really benefit from the speed. For my use case, it mostly just makes moving big files around faster, like ISO files or VM backup images. For transfers to/from the NAS, moving to 10G roughly doubles the throughput. An SMB file transfer on 1G usually bottlenecked around 120 MB/s. The line rate is theoretically 125 MB/s, so once you add in some overhead for SMB and the other protocols that seems about right.
As an example of the 10G speeds, I copied 3 large files from the NAS to my desktop just now, and got 180 MB/s, 250 MB/s, and 270 MB/s. It shifts the bottleneck from the network to the storage. These are sequential read speeds of uncached data. If I do something like download the same large file again right afterwards, once the NAS has it cached in RAM, I get about 800 MB/s. Theoretically there is an in-between speed range where it isn’t cached in memory but is in the l2arc cache on the SSD, but I am not sure what it would be. I haven’t benchmarked it scientifically, but the gist of it is that the storage is the bottleneck now, not the network. Presumably in the future more storage will be SSDs and then having the 10G network will make a bigger difference.
That section at the end
Here we are. The section at the end. What am I supposed to put here, again? Some sage life advice? Promo codes for vacuum cleaners? I guess I will just wing it.
This article described what the current state of my homelab is at the end of 2023. That seems oddly familiar, almost like it is the title of this article.

I typed words and you presumably read them. Unless you are one of those people that skips to the section at the end without reading.
How long can I procrastinate and not write something useful? How long will YOU keep reading this nonsense?
Ok, I will write something slightly more proper. Just stop nagging me about it.
My homelab had a lot of change this year. In fact, I think almost every part of it changed. At the start of this year, I had the modem, the UPS, and one of the VM hosts. Everything else is new. New router, new switches, the 10G network, new access point, new NAS and backup NAS, another VM host, and of course moving from a folding table to a rack.
And that is just the hardware changes. There were also a number of software changes. I have added new VMs this year but also decommissioned others. Or, in some cases, I added them for a few months and then my needs changed and I got rid of them. I also rebuilt my backup setup from scratch. I am not even going to begin describing the effort I put into trying to get a good site-to-site VPN working.
Overall, I feel pretty happy with the current state of my homelab. But it took a lot of time, energy and stress to get it to this point. And… what’s that other thing? Oh right, money. Turns out new stuff is expensive.
What changes or improvements will I make next year? Hopefully, almost none. I just want it to work, stay stable, and stay out of my way. Ideally many elements of this setup can remain in place for the next 3-5 years. It does feel a bit silly to predict that far ahead given how often I have changed things in my homelab in the last few years. I am sure there will be changes to the VMs and containers I run, for example. But it is my intent to move slower and keep things around longer.
My main takeaway from this year is less. I know that probably sounds ironic since in a lot of ways my homelab actually got bigger. But what I am aiming for is that it consumes less time, less energy, produces less stress, and so on. I want it to just continue on humming, serving its purpose, but leaving me free to work on other things I would rather spend time on. It will be interesting to see how the next year goes.
This was a very fun read on lunch break as it echoes a lot of my concerns and thoughts with a homelab, as well as personal dev as a sysadmin or having a nice home.
Zabbix was also a nightmare for me, but at some point learning how the routing and SNMP worked for zabbix using SNMP walker, new docs from zabbix 5 and 6, things have gotten better.
The analogy of a project car and homelab really hits for me because it is sort of a lifeblood and test bed for me that shouldn’t mix, but it does. I need my car to work to drive it and justify it’s not a waste of money, but it’s also unnecessary and definitely too much stress and work for what it’s worth haha. Look forward to reading more!