Computers. They have power buttons and stuff. Sometimes you even press them.
Then, you wait five minutes to actually use it while it turns on. If you are a particularly boring person, you might actually sit and watch.
And while you were waiting, you were thinking.
What if taco tuesday is just a secret government marketing campaign to distract us from more important things?
That’s pretty deep.
Why do cars drive on the right side of the road?
Because it is the right side. What else would you drive on? The wrong side of the road? Duh.
Does this shirt make me look fat?
Yes. Yes, it does.
Now that the intermission has concluded, the computer is now on and ready to be used.
But what was it doing during that time? Let’s start from the beginning.
The Power Button
As I mentioned, computers have power buttons. For the purpose of writing this article, I am going to assume you understand what a button is. Otherwise…. get help or something.
The power button is connected by a wire to the motherboard. It doesn’t actually turn the motherboard on. Assuming your computer has power – either a laptop with a charge, or a desktop connected to a power outlet – the motherboard is actually always on, just waiting. It is in a low-power mode.
When you press the power button, the motherboard detects it. Then, it sends a request to the power supply:
GIMME MORE POWAHHHHHH!
Then the power supply says:
Ok then.
Once more power starts flowing, stuff starts turning on. Some things, like hard drives, are connected directly to the power supply. Other things, like fans, are connected to the motherboard and receive their power from it.
Eventually, your CPU gets power and starts running. Now, CPUs are very stupid simple. They are fast, but they don’t really know how to do anything. You have to tell them exactly what to do.
Although… what does the computer need to do? What is our end goal?
What we want to do is start an operating system, like Windows. This is also known as booting an operating system. Apparently the origin of the term has nothing to do with putting on a boot and kicking the computer, though it hasn’t stopped people from trying.
We want to start an operating system because that is what our programs run on. And ultimately, we use computers because they have useful programs.
However, before we start the operating system, something else must be run first – the BIOS.
BIOS
The BIOS, or Basic Input/Output System, is firmware. Firmware is basically software that is made for a specific piece of hardware, like a specific model of motherboard.
When you turn on your computer, the first thing you see is not the operating system, but actually the BIOS. Bam. I just blew your mind.
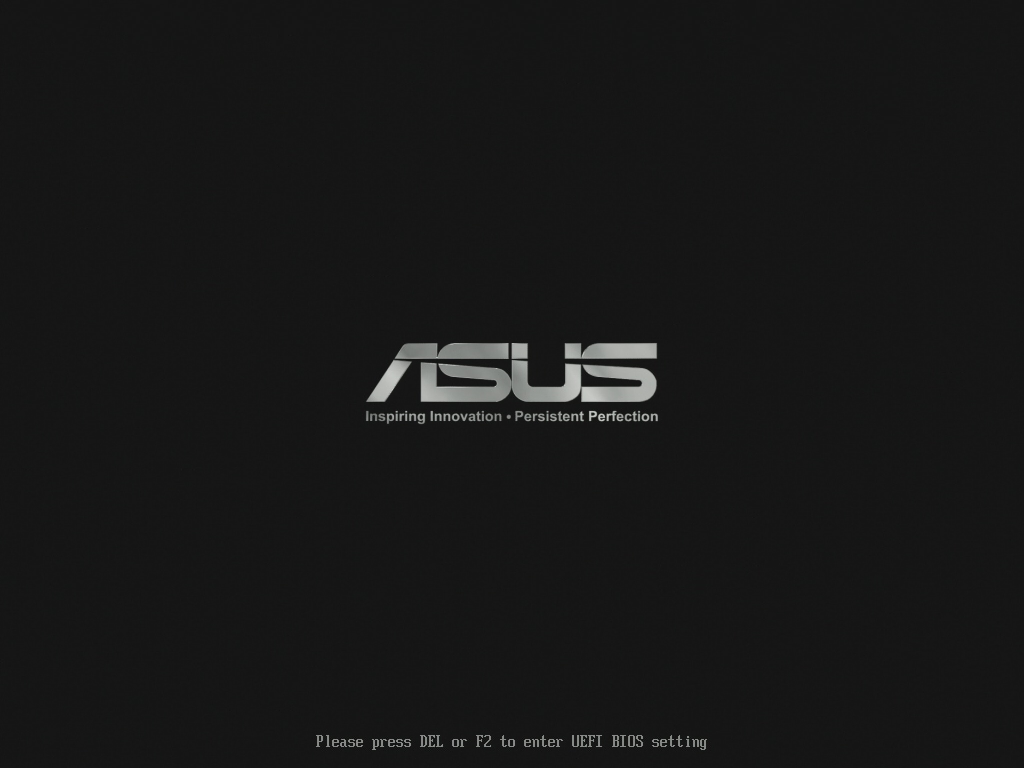
The BIOS usually shows a manufacturer logo – Dell, for example – and also several key actions, like “F2 for setup.” The BIOS runs relatively quickly, usually taking between 2 and 10 seconds.
While the BIOS in this picture shows you the keys to press, not all do. When the BIOS doesn’t tell you what keys you can press, you either have to randomly try keys or look up the correct keys to get into the settings menu.
The job of the BIOS is to deal with the hardware when your computer starts up. This includes tasks like providing power to and initializing settings on connected devices, like hard drives or graphics cards. Collectively these tasks are called the power-on self-test, or POST. Once the BIOS completes these tests, it is said to have POSTed. If it fails to POST, there may be a hardware problem.
Once the BIOS has setup all the hardware, it has one final task – passing control onto the operating system. The BIOS “lives” in a chip on the motherboard. Your operating system, on the other hand, resides on a storage device – typically a hard drive. The BIOS loads the operating system from the storage device and runs it.
And by run it, I mean your operating system starts its own loading process, which takes much longer. At this point, you see your operating system splashscreen – the Windows logo, for example.
One eternity later, your operating system has loaded, and you can log in.
Then proceed to wait even longer to actually run anything, because… computers.
But eventually your computer is usable and you can do whatever you turned it on to do in the first place.
That is the high-level overview of the process, but I left out some interesting details. Let’s go over them, shall we?
Choosing What To Boot
One of the main functions of the BIOS is to boot an operating system. Remember, though, computers are stupid. You cannot just say “load this operating system.” There has to be a very specific set of steps for the computer to follow. The boot process is no exception, and the BIOS follows a series of steps. These steps are roughly divided into two parts.
The first part is deciding what storage device to boot from. Typically this is a hard drive, but it doesn’t have to be. You can boot from floppys, CDs, DVDs, flash drives – even from something your computer downloads from the network when it first turns on. Furthermore, there can be multiple choices among each category – multiple hard drives, for example. How does the BIOS choose which device you want to boot from?
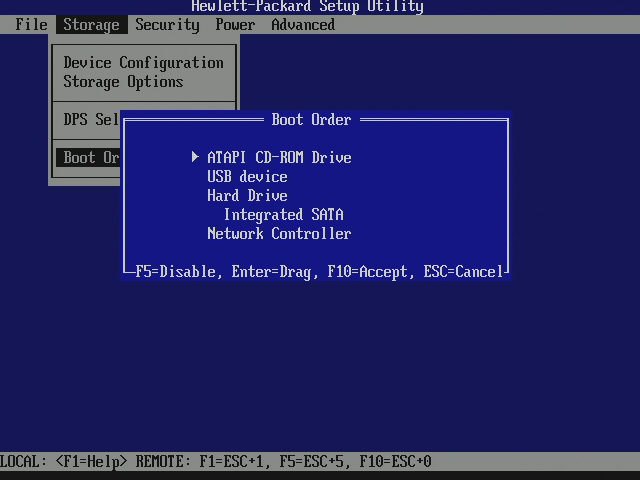
Generally speaking, there is a default order. For example, perhaps the BIOS first checks if it can boot from a CD or DVD, then if it can boot from a flash drive, and finally it checks a hard drive. You can also configure what this order is in your BIOS settings (which can be accessed via one of the key options you see when you turn your computer on).
Once the BIOS has POSTed, it begins going through the boot order list looking for something to boot from. Some things are bootable, and some aren’t – more on that in the next section.
If an entry in the boot order list isn’t bootable, the BIOS moves on to the next entry. It continues this process until it finds one that is bootable. If it goes through the entire list without finding something to boot from, it will fail to boot and display an error message describing the problem.
Assuming it does find a bootable entry, it has to boot from it – but how?
The Master Boot Record
Ah, the good old MBR. It sounds kind of fancy, doesn’t it? It is actually pretty simple, though.
Any bootable device has to follow a few rules if it wants the BIOS to boot from it. The rules all have to do with a specific format of the first sector of a storage device. Storage devices are divided up into many, many 512-byte sections called sectors. The first sector on the device has to be in a special format – known as the MBR – for the BIOS to recognize the device as bootable.
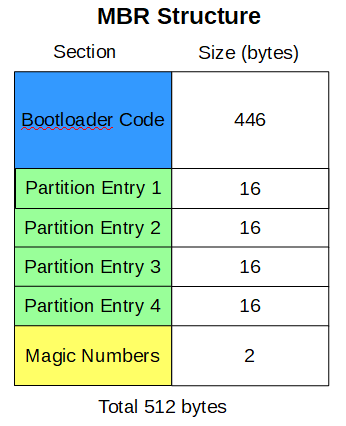
You can find diagrams of exactly what the format is, but for our purposes today we will simplify it and say it only contains three things.
The first 446 bytes are bootloader code. A bootloader is basically just a program that boots or loads something else.
The next 64 bytes are 4 16-byte entries describing partitions on the storage device.
The final 2 bytes are magic numbers. A magic number is just an arbitrary number that has no external meaning – 42, for example. In this case, those two bytes must have specific standard values (0x55 and 0xAA if you like hexadecimal). The BIOS looks for these numbers to determine if a device is bootable or not. If a device isn’t specifically made to be bootable, it is very unlikely it would happen to have those exact two bytes with those exact values, so it is kind of like a safety check.
The process for booting a device with the MBR format is pretty simple. Once the BIOS finds a bootable device, it simply runs the bootloader code found at the start of the device. The bootloader code is instructions that tell the CPU what to do. The BIOS just says “hey, CPU thing, start reading here” – right at the start of the device – and away it goes.
The end result is that the BIOS knows next to nothing about what it is booting. However, this is also extremely useful because it allows the BIOS to boot just about anything.
Bootloaders
So, the BIOS runs the bootloader code and we have an operating system, right?
Yes… and no. The bootloader is actually an entirely different layer between the BIOS and the operating system, for a few reasons.
The first reason is space. 446 bytes is not enough room for code to load an operating system. 446 bytes is enough room for a small program that locates and runs more code somewhere else that does the rest of the loading.
Modern bootloaders have at least two stages. The first stage is the 446 bytes in the MBR, on the first sector of the storage device. The second stage is much bigger, and is located somewhere else on the storage device – where exactly depends on the bootloader, but it is usually in the sectors following the first sector. The first stage’s only job is to load the second stage. The second stage’s job is to load the operating system.
The second reason bootloaders are more complex is because operating systems have to be loaded in specific ways. The exact details of loading a particular operating system are numerous and complex, but suffice it to say a lot is going on. It is also specific to each operating system – Linux is loaded differently than Windows, for example. Operating systems and bootloaders are designed in this layer style to reduce complexity in certain parts of the code and maintain a cleaner separation between parts, which makes the individual parts easier to understand.
You keep saying words, but they aren’t really making any sense. What was the point of bootloaders, again?
The key takeaway here is layers. They work for cakes and they work for your computer. The BIOS loads the first stage of the bootloader, which loads the second stage of the bootloader, which loads the actual operating system. Easy enough, right?
Dual-Booting
If you are like most people, you only have one operating system installed. And, like most people, you are booooooring.
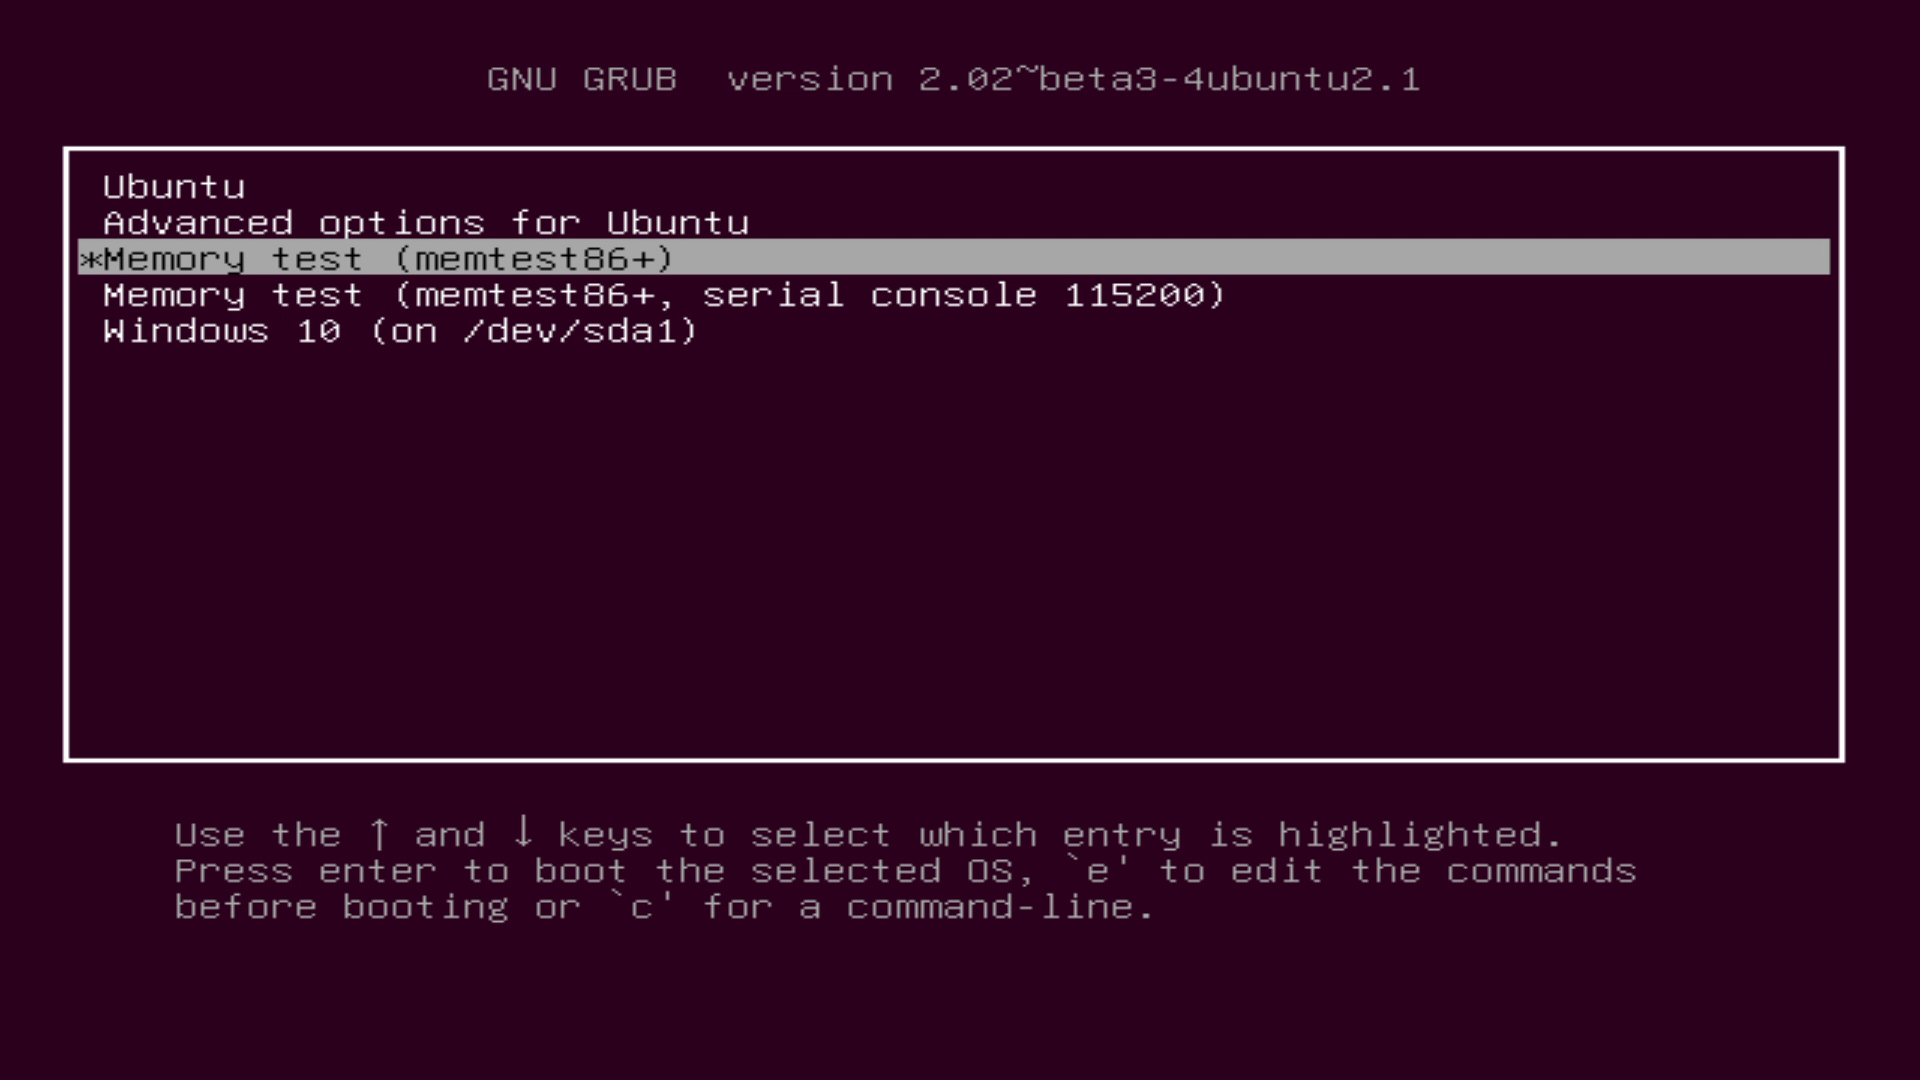
As it turns out, you can have multiple operating systems installed on the same storage device. This is known as dual-booting. When you turn your computer on, you choose which operating system to use. Neat, huh?
For example, in this image, you can choose between Ubuntu (a version of the operating system Linux) or Windows. This screen is displayed when your computer is starting up, giving you the option to choose what operating system you want to use.
This functionality is made possible by our good old friend, the bootloader. To understand how this works, we must first understand partitions.
Partitions
Hard drives or other storage devices are usually partitioned into several sections. It is basically like cutting up a pie (mmm… pie), where each slice can contain an operating system. Each partition can be as large as you want, but the total size of all the partitions must add up to the size of the storage device.
Why use partitions? I think pizzas are a good example. Suppose you and I were going to order a pizza. I, being quite classy, want a pizza with mushrooms, some random fish bits, maybe some bacon… and so on. You, being rather plain, opt for a straight-up cheese pizza.
But there is a problem. You are paying for the pizza, and you are cheap. So you only want to order one pizza. But we both want different things. What can we do?
Well, we could just split it in half. My half would be decorated as I want it, and likewise for your half. We would partition the pizza.
The same holds true for hard drives – they can be partitioned into different pieces, so they can hold multiple things. However, in order for this to work, we need to store information that defines what the partitions are – how big each one is, for example.
This information is actually stored in the MBR. After the 446 bytes of bootloader code are 64 bytes of partition data – specifically, 4 partition entries, each 16 bytes in size. With these entries we can define up to 4 partitions, each of which can contain an operating system.
Those of you who are pedantic (with your pedantic pants on, no doubt) might point out that you can have more than 4 partitions. That is true. The partition table only supports 4 entries, and in order for it to remain compatible with older computers and software, it cannot be changed. But many people were not content with only 4 partitions, and came up with a workaround called an extended partition. One of the original 4 partitions slots in the MBR is designated as the extended partition, and it points to the location of another partition table which can contain more entries. In other words, a backwards-compatible way of having more than 4 partitions was created.
Here is an example of what partitions look like in a partition editor:
Each partition starts at a particular location on the disk and has a specific size. Some areas of a disk may be unallocated – these are areas that contain no partition and are simply empty. Partitions can be deleted or resized after they are created, but they cannot be shifted or reordered. The size of all these partitions (including unallocated areas), when added up, is equal to the size of the disk.
Dual-Booting and Partitions
As I mentioned earlier, bootloaders allow us to dual-boot. The reason this works is because bootloaders really boot partitions. The BIOS boots a storage device. The bootloader (contained on said storage device) boots a particular partition on that device.
When dual-booting, you simply have two or more operating systems installed, each in their own partition. Then, once the BIOS boots the storage device, the bootloader offers a menu where you choose which partition – operating system – to boot from.
A Few Other Things
Assuming you have followed along so far, you now have a pretty good grasp on what your computer does when it turns on, and the various steps of the boot process.
There are a few random things worthy of note. One of them being my trend-setting fashion sensibility, but I digress.
The first thing to note is that many computers don’t actually use the BIOS anymore.
Wait, what? You just made me read 2000 words about something that isn’t even used anymore?
Kind of. BIOS has been around for a very long time – longer than I have been around, actually. It worked, for the most part, but after over 2 decades in use, some problems with it became clear.
To fix various shortcomings and add new features, the Unified Extensible Firmware Interface (UEFI) standard was created and adopted by the industry. If you have a computer that came with Windows 8 or later, or a Mac from 2011 or later, your computer most likely uses UEFI.
While UEFI does improve a number of things, it also isn’t fundamentally different than the BIOS. The steps of the boot process are still roughly the same as before, and accessing menus within the UEFI still looks like the BIOS did in most cases. In fact, the UEFI standard mandates backwards compatibility with the BIOS standard, so you can boot from storage devices that are MBR-formatted. This is often referred to as legacy boot.
Another thing to note is that Macs are a bit different than PCs in regards to booting. You know, because everything Apple does must be different than everybody else.
Since 2011, Macs do use UEFI – or, more accurately, EFI, an earlier version of the standard. However, the EFI used by Macs isn’t exactly the same as UEFI, and it has various proprietary extensions as well. The end result of this is that things like dual-booting (or just using a non-OS X operating system) on Macs is usually possible, but more difficult and not officially supported. Wonderful.
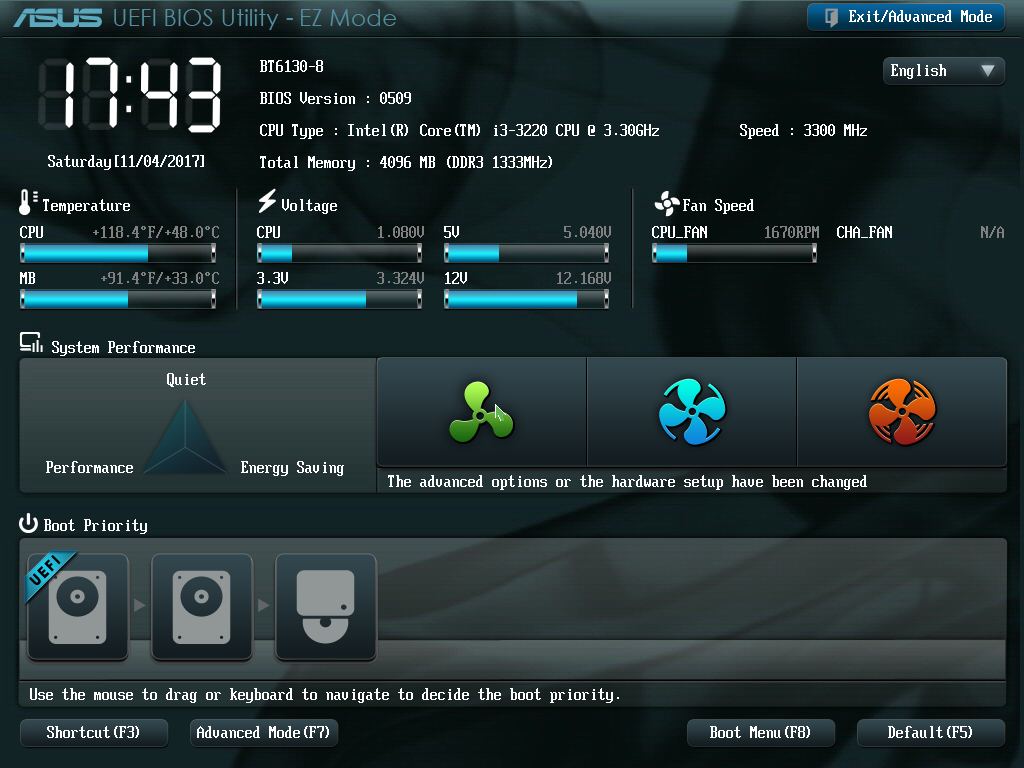
Finally, one of the improvements the UEFI standard brings is mouse support as well as more advanced graphical capabilities. Prior to UEFI, most BIOS’s looked about the same – usually just textual menus you navigated with your keyboard. Now computers with UEFI can have menus that you navigate with your mouse, and they can include images as well. For example:
There is a slight caveat: while UEFI allows motherboard manufacturers to create menus such as this, it doesn’t mean they have to. Many UEFI menu screens look just like their BIOS counterparts.
Ok, that’s it. Really. I am actually done this time.
Go stare at a computer or something.


Ok, that was Awesome.
Now I’m going to watch Penny Dreadful because I am off duty and it amuses me to do so. Then sleep.
More tech tomorrow!